
This command allows you create a small patch that can be distinguished from the room surface on which it is located. It can also be a surface elevated above the floor (such as a table top). This command is available in the Room View and the Map View.
Shortcuts:
Room Toolbar:
After choosing the Create Surface Overlay command, this dialog will appear:
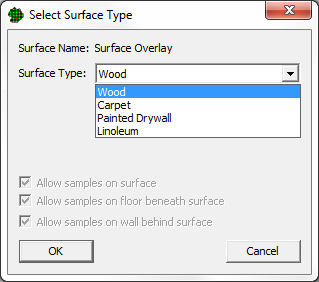
Choose the Surface Type for the new Surface Overlay and click OK.
Then click on 2 opposite corners that define a rectangle on a room surface. If the Drawing Guide is turned on, the corners will snap to the nearest guide points.
After choosing the Create Surface Overlay command, this dialog will appear:

Choose the Surface Type for the new overlay.
Choose whether you want the Surface Overlay to appear on the floor or the ceiling (both surfaces appear the same from the Map View)
Choose whether you want to create the surface overlay as a simple rectangle or as a complex polyline.
Click OK.
If creating as a rectangle, click on 2 opposite corners that define a rectangle in the room. If the Drawing Guide is turned on, the corners will snap to the nearest guide points.
If creating as a polyline, click on each point that defines the shape in the room. If the Drawing Guide is turned on, the point will snap to the nearest guide point. When finished adding points: Right-Click to finish and complete the surface overlay shape.
After creation, the Surface Overlay can be modified by right-clicking on it in the Room View or the Map View. A dialog will appear and allow you to:
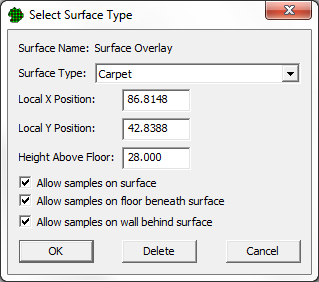
Change the Surface Type
Change the X and Y Position inside the room.
If the Surface Overlay is on the Floor, you can also:
Change the Height Above Floor (such as the height of a table top)
If the Surface Overlay is raised above the floor, you can also:
Block samples on the Surface Overlay itself
Block samples on floor beneath the Surface Overlay
Block samples on the wall behind the raised Surface Overlay
You can delete the Surface Overlay by clicking the Delete button.
The location and shape of Surface Overlays can be edited from the Room View or the Map View.
If the Surface Overlay is on a wall surface it must be edited from the Room View (because wall surfaces are not visible from the Map View).
In the Map View, you can only edit Surface Overlays that appear in the Current Room.
Select the object by clicking on it (little black boxes appear at each vertex point to indicate that it has been selected)
Drag it with the mouse to a new location
If using the Drawing Guide, the Surface Overlay will snap to the nearest guide point.
Pressing the Del key will permanently remove the Surface Overlay.
Select an edge or a single vertex point by holding the Shift key down and clicking on it (a little black box appears at each selected vertex point to indicate that it has been selected)
Drag the edge or vertex point with the mouse to a new location. Hold the Ctrl key down to keep the points aligned vertically / horizontally. If using the Drawing Guide, the vertex point or edge will snap to the nearest guide point.
Pressing the Del key will permanently remove the vertex point or edge.
A new vertex point can be added to the Surface Overlay by Right-Clicking on the edge where you want to insert the point.
You can use Undo to reverse the latest change to the shape or location of a Surface Overlay.